Monday, January 19, 2015

Verdavanti

A marijuana grower/distributor in Washington asked for my photography services. I was hired to get photos of the products to be used in promotional materials along with their website. This was and awesome gig. I got to play with all my toys and I got something out of it. This was not the fist paid gig, but it was more fun than the rest. It was challenging.  

First off i must begin by saying i know nothing of Marijuana. I know it's legal in Washington and Colorado and that the smell of the Marijuana smoke makes me sick.  With that in mind I was excited. The challenge, how to photograph plants. What is the right lens? What is the right lighting?
Here comes the breakdown. 

Lighting Set Up

For almost all of the shoot i have used to 2 lights(strobes $120) 2 stand($60) s and 2 umbrellas($40) and triggers ($50). This is the cheapest Strobist kit you can put together. Its portable and it's not bad. If you don't know what a strobist is, check out David Hobby's
Strobist.com  for more information. He is a great photographer, DIYer and budget photographer that has great ideas and reviews. 

Lenses

For the product shots  

Also for the product in the jars I used a light tent.
LimoStudio 25" x 25" Square Light Box Tent with 4 x Backdrops

There are other things that I didn't include here because it seems like it was too much. But at some point in the photo shoot i pulled the plants out of the growing light and used the white inside of my LimoStudio 43" 5-in-1, Reflector as a background and shot the plants in the pots. So ya a $15 dollar thing can be used for many purposes.


This was a great experience and I'd love to do it again. And if you get a change you should get out there and challenge yourself and take some great photos.

If you like my photos follow me on instagram. +monkifoto  @monkifoto

If you are interested in the products I just photographed, check out their website.

Verdavanti - Pacific Northwest's Premier Cannabis Grower


Friday, November 21, 2014

Studio Portraits & Retouching

Here are 2 videos that will help me and beginners get better portraits.

How to light and the 5 different types of lighting for portraits


How to edit and touch up portraits


I know i have used the retouch video for one of my photos and it does an amazing job.
Try it and leave your comments below, or if you have better tutorials. Feel free to send them to me.

Friday, November 14, 2014

Latest Automotive Work.


You can find high resolution of all these photos on my Flickr
Feel free to share with those who might enjoy.

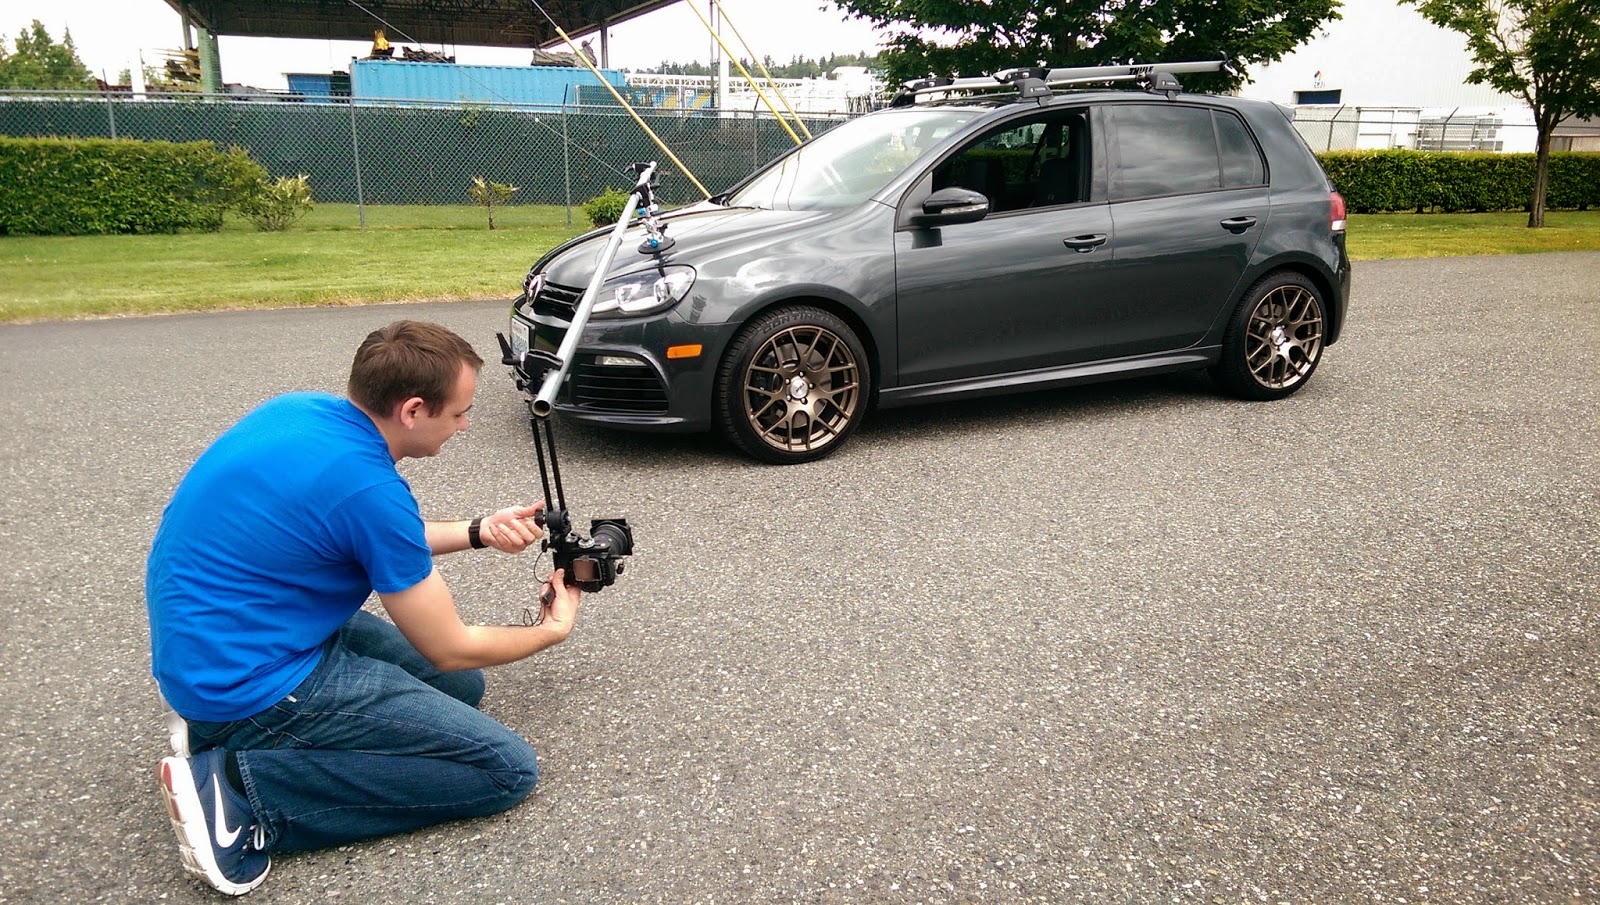
I use a DIY rig that I put together with the following parts.

I used the
2 Avenger F1000 Pump Cup with Baby Swivel Pin
2 10 ft pipes from Home Depot.


Thursday, November 13, 2014

Etsy Store

Recently I have been talking to local hobbyist photographers about displaying their art and selling channels that are available to artists. The problem now days is, the market is saturated with amazing photographers. They are all competing for a decreasing number of buyers out there over 100s of channels each being flooded with great photographs.

Examples:
  1. www.pixoto.com
  2. www.500px.com 
  3. www.etsy.com
  4. www.flickr.com
  5. www.instagram.com
  6. www.dreamstime.com
  7. www.fotolia.com
The list goes on.

One factor that plays into the low number of buyers out there is the affordability of digital cameras. Now days there is an increasing number of DSLRs in the average home. Yes most of them are entry level with kit lenses gathering dust. However it gives too many folks the false impression that they could easily get out there and take amazing shots like some professional photographers making them less inclined to purchase photographs available on the web.

The other factor affecting everyone, is the vast numbers of amazing photographers out there fighting in the same space. This is one of the outcome of the first factor. Affordable cameras, yields more people trying their hand at this craft and some of them being very talented and determined.

The moral of the story is: there are lots of ways to get photographs out for people to see, the problem is there are very many great photographers out there, so unless you have something special to show, it will be very hard to get anywhere.

That being said, there some really crappy photographers out there that manage to sell their craft and to get published. That being said, don't give up, don't let yourself be intimidated by the amazing photographers out there and give it your best shot.

I wont be giving up, I even set up and Etsy store: https://www.etsy.com/shop/monkifoto

Monday, November 10, 2014

Columbia Tower in Seattle

On Sunday after spending all morning working on automotive rolling shots I decided to go to catch the sunset at the Columbia Tower Sky View Observatory. I have been in Seattle for 16 years and I have never been up to the observation deck. I think this is a must see place for anyone visiting Seattle. Don't forget, bring your fancy camera with you.


If you do bring your other fancy camera, AKA not your iPhone make sure you get one of these wide angle lenses with you to capture the true beauty from up there. I used my trusted Tokina 11-16mm f/2.8 Digital Zoom Lens  Now if you do this at night, you will get glare because you have to shoot thought the glass and there are lots of lights on in the building. My recommendation to you is, press the lens against the glass and that is a last resort or in my case (Cheap/Lazy Man's solution). If you are not like me and you love DIY's, here is a great article from F Stoppers shoot through glass without reflections. Check out that article and you will find some great resources.


Tuesday, October 28, 2014

Posing People - Digital Camera World

Digital Camera World Has really great stuff.  I follow them on some of the media sites and these were some of the cheat sheets that they posted that interested me. Recently I have been more interested in portraits than all the rest. They really present a challenge, not only working your camera and the lighting setup, but also getting the model to work with you. 


Here are a couple of videos that i think would be helpful. 

Thursday, October 23, 2014

Professional Portraits Outdoor.

Last weekend i was asked by a friend to go take some professional portraits of him. Well challenge accepted. I figured it would be a great way to test the tip the Matt Granger suggested. See my previous post for video.

I followed his advice. Shot everything with a B&W review and it made things a lot easier. I will be continuing to shoot this way. I can also confirm that you RAW files sill have the color data. So don't be afraid to use it.

Here are the samples:
(All of these were shot with Tamron SP 70-200MM F/2.8 DI VC USD and used a Nikon SB-28 Speedlight Flash to light up the shadows)